Neighbor Mike offered me his fuel disconnect tool. Since the fuel lines were one of the few remaining attachments to the engine I took him up on it, as well as his offer of help. We couldn’t get the tool to work with the tight spacing under the cowl, so we removed the fuel line and injectors from the intake. Once we had room to work it just took brute force to push the tool into the release clips, freeing the fuel lines from the rail.

Mike was willing to stick around and keep helping so we tackled the passenger side exhaust manifold. We removed it out the bottom after disconnecting the AIR fittings from the top and the EGR pipe near the y-pipe connection. Those things are heavier than they look. I’d like to bring the bathroom scale out and weigh everything that is coming off to get an idea of how much extra weight is being added once complete.
Because I’m removing the engine from the top, I’ve decided to remove as much as possible from the block to make maneuvering easier. So we removed the intake and the driver’s side cylinder head. We found out that when you remove the first cylinder head bolt coolant spews out. We decided to let it since it comes out more controlled there than from the water pump, but I’m sure that more will come out the water pump when that comes off too. I also found out that the coolant line that runs between the cylinder heads is a major pain to get a wrench on strong enough to break free. After almost stripping it, I opted to bend it by rotating the cylinder head so I could get a socket on it. Then it removed easily. Hopefully if it is needed again the bending didn’t hurt it, it seems pretty flexible.

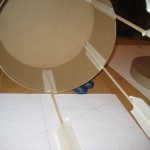
Why would someone put a bolt way back here?
It was neat to see the cylinder heads off the car and poke around at the valves and springs. The engine bay is really opening up as some of the larger parts come out giving me hope of squeezing a couple of batteries up there.

140k Miles

There were some metal flakes in the back 2 cylinders, on the pushrods too.

Neighbor Mike takes parts off fast
One of the junkyards near us has changed to a scrap metal dealer so I’m hopeful I can take the exhaust and other miscellaneous metal there instead of just throwing it out. If I can get $70 or more for it, the project thus far would actually be a gain as far as budget. I’m sure that wouldn’t last too long though.