Archive for April, 2010

Task List

Saturday, April 24th, 2010

This is intended to be a list of everything I can think of that is left in Version 2.0. I’ll cross things off as they’re complete and add on as I figure out more stuff I forgot. Not too much further, although there is obviously stuff I’m missing.

Low Voltage

  1. Wiring for + and – LV to terminal bus
  2. Wiring from relocated negative contactor Raptor negative to DC/DC
  3. Vacuum relay triggers to terminal bus in control box.
  4. Split loom on wiring – What a pain, delayed
  5. Connectors for positive and negative from DC/DC to battery
  6. Raptor sensor wiring

Manual Disconnect

  1. Bike brake cable from cabin to breaker
  2. Handle for brake cable

Throttle

  1. Test the pot box for full throttle
  2. Secure cable to frame
  3. Reattach the return spring securely

High Voltage Cables

  1. Purchase bolts for negative contactor and motor
  2. Cable from control box to Raptor B+
  3. Reconnect all battery strings (front batteries) (rear batteries) (front to back)
  4. Connect charging cable to most positive
  5. Connect charging cable to most negative
  6. Mount negative contactor and wire to switch and ground.

High Voltage Conduit System

  1. Determine cable routing
  2. Locate bracket points
  3. Determine split for negative to enter contactor box
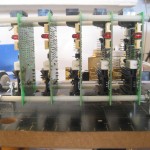
Battery Regulators

  1. Phone cable from front to back
  2. Phone cable to charger
  3. Test with yellow light
  4. Troubleshoot front regulator erratic behavior

Miscellaneous

  1. Secure the ABS sensor on top of the rear axle
  2. Check air pressure in suspension bags
  3. Top off battery charge
  4. Tee fitting for vacuum line to operate A/C valves
  5. Alignment for manual steering rack

Lots Today Though

Saturday, April 24th, 2010

Today was a pretty productive day.  I made a bunch of wires and mocked up the fitment of the Raptor as well as the negative contactor box.  It will go where the catalytic converter was or possibly on the driver’s side, depending on routing of the conduit for the wiring. Also updated: wiring from switch to negative contactor, controller to motor cables, LV wiring to Raptor.

Nothing to See Here

Friday, April 23rd, 2010

The past few days I’ve been working on the LV wiring. Mostly cleanup, re-routing wires. I spent about an hour today moving wires from one side of a box to the other so they could be routed into my new box. So in summary it’s progress but you wouldn’t know it to look.

Getting closer though.

Big Progress Day

Saturday, April 3rd, 2010

Got a lot done today, focusing on the rear of the car. The regulator octobox is cleaned up and I have the rest of the bolts and nuts needed for it. It is bolted to the car and ready for the regulators to be inserted.

The wooden battery cover was cut, routed and installed on hinges. I have a slight clearance issue with a battery post but I think I can work around that with shorter bolts on the hinge or rotating the battery if need be.

Last thing to do is route the AC from the gas cap to the charger and the DC from the charger to the battery pack Anderson connection. Once those are done the rear batteries can be reinstalled and wired up.

The front HV box will be ready to install after I mount the DC converter to its side. Then the Raptor can go back in followed by a cleanup of the LV wiring (vacuum pump primarily) and we’re ready for another road test.

I have an idea for the wooden cover.  I’d like to stain it somewhat dark then have the Trans Amped logo printed across it, possibly with some stats on the car as well.  I’ll probably focus on the logo to keep it clean.

This is the Trans Amped logo that my brother had made for my birthday.  The + and - are nicely incorporated into the traditional Firebird look.

This is the Trans Amped logo that my wife and brother had made for my birthday. The + and - are nicely incorporated into the traditional Firebird look.

Drilling holes for the 'octobox'

Drilling holes for the

Mounted 'octobox' for the rear regulators

Mounted

Wooden cover installed.

Wooden cover installed.

Conflict with hinge and battery post

Conflict with hinge and battery post

Front HV Box

Friday, April 2nd, 2010

As part of my safety upgrades I’m making an enclosed front box that will contain all the HV connections except the Raptor and Motor. It’s a 12″ square by 6″ deep junction box. A plastic tray will hold all the parts then it will bolt to the box with a space below for all the bolts. This minimizes the number of holes drilled into the box the keep it watertight.