So a few days ago I thought I was going to take a break from working and let things settle down after the whirlwind of making battery racks and mounting so many things. The good news is I ended up not making it that long. After a frustrating day on the computer at work (new software that doesn’t work and has to be used) I left early and decided to work a little on the car. That was a Thursday and things clicked off pretty well.
So roll forward to last Saturday and I woke up early and went out to wash the gas-car. I found that there were little specks all over it making it feel kind of gritty. I hadn’t washed it in a few weeks so I attributed it to road grime but after closer inspection I found out it was metal dust from all the cutting and grinding on the Trans Am. So learn a lesson from me and move your good cars further away while working on the ev convert. Most of it came off with a clay bar but I’ll need to go over it another time or two to get the stubborn bits. I needed my energy that day to get some car stuff done…
So last Saturday and some evenings this week I finished a bunch of small tasks and actually got a little ahead of myself on some things. A list:
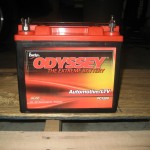
- Completed high voltage wiring. I have not connected all the batteries because I don’t want 156 volts humming around while I’m still doing the low voltage, but everything is ready to bolt in.
- Completed and mounted the main control board. High voltage wiring is complete and installed from fuse to contactor to shunt to controller and from the controller to the motor.
- Installed the DC/DC controller and wired it in
- Completed wiring for the motor blower
- Completed wiring for the power steering motor
- Made wires and a terminal block that will be electrically live with key on and tied all my relays into that.
So I said I got ahead of myself. Today I removed the main control board after scrapping my hand up one too many times. I thought I could install the battery regulators just reaching under it but it was a pain. While I have it out I completed the 6 guage wire wires that will connect the charger to the most positive battery up front and most negative in the back. I bought two lengths, 10-ft of black and 5-ft of white. Thinking that I had wire to spare I cut off about 1.5-ft of the white to use to tie the DC-DC converter to the negative battery post. That left me with about 2″ to spare when I ran the wires from the front to the back. I had to reroute the long wire from one side of the car to the other because it was too short, but ultimately it worked out. I have another tip to add to my collection for future convertors: While it is a good idea to do a test run of your wiring to make sure it is long enough, you shouldn’t get over zealous and actually attach the wire to the car, especially if you haven’t crimped the lugs on because you don’t know how long the wire needs to be. I was able to remove only one clip and make my crimp on the side of the car, but it was close.
I also tested my pot box and it seems pretty linear. I hope the fire didn’t damage it. Oh, you didn’t know about the fire? Well I’ll tell you. I was going off memory and for some reason I thought you had to connect a battery to the pot box so the resistance could be measured. I did that and connected the multi-meter to the wires that will connect to the Raptor. Raptor is cooled to say than controller. As soon as I moved the throttle lever, the battery dumped who knows how many amps into the too small wires that probably shouldn’t have been connected that was anyhow. So the wires puffed and were on fire. I blew it out and figured out that a resistor works whether there is a load going through it or not. So I undid all the connections except for the multi-meters leads and it still shows me 0-5k ohms resistance, pretty linear but a little jumping. It could have been my unsteady left hand holding the assembly and my unsteady right hand moving the lever, so we’ll see how it goes once it it mounted to something solid.